3D Character Acting
Transform static models into compelling actors with our intensive 3D character acting course. Master emotional nuance, body language, and believable performance techniques to make your characters connect with audiences on a human level.
Animate believable, emotional character performances in our intensive 8-week course
Designed for aspiring 3D animators, this comprehensive eight-week course on Seed LMS guides you step-by-step through Autodesk Maya, AnimBot, and innovative AI workflows. You will master the essential skills of body mechanics, pantomime acting, lip sync, and facial micro-expressions while building believable, emotional character performances. Beyond the core eight weeks, you’ll receive two full months of free, one-on-one mentorship to polish your animations, troubleshoot the Graph Editor in real-time, and confidently build your 3D portfolio. Choose from our curated pool of 10 exciting animation briefs, refine your skills, and graduate with a high-quality animation reel.
Course Outline
Week 1: The Physics of Motion (Balls & Pendulums)
Topic A: Maya for Animators
- Interface: Timeline, Graph Editor, and Viewport 2.0.
- Keyframing: Set Key (S), Auto-Key, and deleting keys.
- Tangents: Auto, Spline, Linear, and Stepped (Blocking) tangents.
Topic B: Timing & Spacing
- The Concept: Timing is when it happens; Spacing is how it moves.
- Slow In & Slow Out: Using the Graph Editor curves to create acceleration and deceleration.
Topic C: Squash & Stretch
- Volume Preservation: Ensuring the object doesn’t grow or shrink magically.
- Materiality: How a rubber ball deforms vs. a bowling ball (No deformation).
Week 2: Overlap & Follow Through (The Tail)
Topic A: Arcs
- Natural Motion: Why organic movement follows curved paths (Arcs).
- Tracking: Using Motion Trails in Maya to visualize and polish arcs.
Topic B: Follow Through & Overlapping Action
- The Drag Principle: The tip of the tail follows the base.
- The Wave Principle: Creating fluid motion in whips, tails, and hair.
Topic C: Secondary Action
- Definition: Gestures that support the main action (e.g., a character whistling while walking).
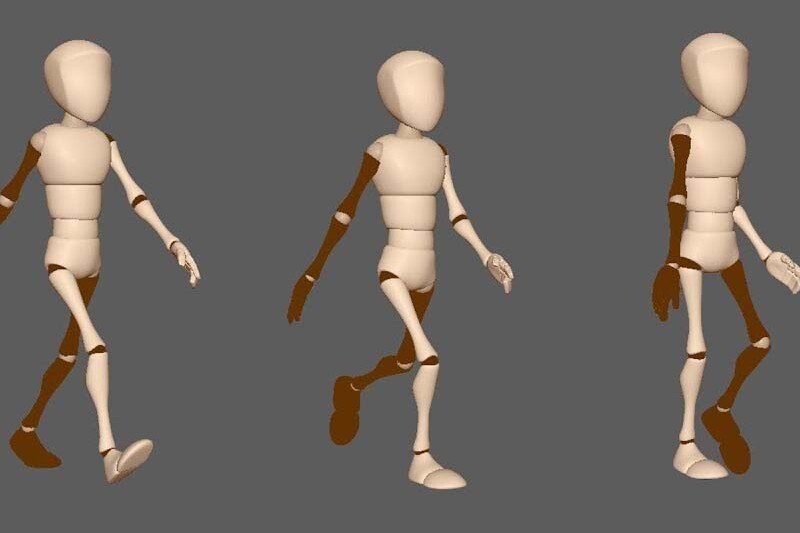
Week 3: Body Mechanics I (The Lower Body)
Topic A: The Walk Cycle
- The 4 Key Poses: Contact, Down (Recoil), Passing, and Up (High Point).
- Foot Roll: Animating the heel-strike to toe-off.
Topic B: Weight & Balance
- Center of Gravity (COG): Keeping the character balanced over their feet.
- Hips: The engine of the walk. Hip rotation and up/down movement.
Topic C: Solid Drawing (in 3D)
- Posing: Avoiding “twinning” (symmetry). creating strong silhouettes.
Week 4: Body Mechanics II (Physicality)
Topic A: Anticipation
- Telegraphing: Preparing the audience for an action (e.g., bending down before jumping).
- Exaggeration: Pushing the pose to make it readable, not just realistic.
Topic B: The Run Cycle
- Air Time: The difference between a walk (always one foot on the ground) and a run (both feet leave the ground).
- Lean & Force: Leaning into the direction of travel.
Topic C: Staging
- Camera Angles: presenting the action clearly.
- Silhouette: Ensuring the pose reads clearly even in black and white.
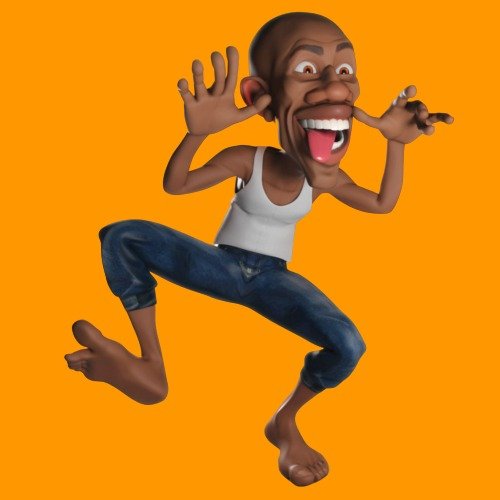
Week 5: Pantomime Acting (Story without Words)
Topic A: Acting for Animators
- Thought Process: Seeing the character “think” before they move.
- Eye Darts: How eyes move when processing information.
Topic B: Blocking vs. Splining
- Stepped Mode: Focusing on the “Golden Poses” first without letting the computer interpolate.
- Retiming: Adjusting the timing of the block out to create “Snap.”
Topic C: Appeal
- Charisma: Making the character interesting to look at (not necessarily “good looking”).
- Rhythm: Varying the timing (fast/slow) to avoid robotic motion.
Week 6: Introduction to Dialogue & Lip Sync
Topic A: Jaw Mechanics
- Open & Shut: The jaw drives the mouth. Animating the jaw bone first.
- Vowels vs. Consonants: O, A, E (Open) vs. M, B, P (Closed).
Topic B: Mouth Shapes (Visemes)
- Wide/Narrow: Simplifying shapes. You don’t need a shape for every letter.
- The “M” Pop: Compressing the lips before an M/B/P sound.
Topic C: Acting with Audio
- Listening: Animating the character listening, not just talking.
- Accents & Beats: Hitting the key gestures on the stressed words.
Week 7: Facial Performance & Micro-Expressions
Topic A: The Brows
- Emotion Center: Squeeze (Anger), Raise (Surprise), Inner Raise (Sadness).
- Asymmetry: One brow raised vs. both.
Topic B: The Eyes & Lids
- Blinks: Using blinks to reset the gaze or show a shift in thought.
- Lid Follow: The eyelids must follow the pupil as it looks up and down.
Topic C: Subtext
- Saying vs. Meaning: Animating what the character feels, not just what they say.
Week 8: AI Workflow, Polish & Final Sprint
Topic A: Innovative AI Workflow (Using Gemini)
- Subtext Analysis: pasting the dialogue script into Gemini to get a psychological breakdown of the character’s hidden motives.
- Prompt Example: “Analyse this line of dialogue: ‘I’m fine, really.’ The character is actually lying. Suggest 3 physical gestures that would reveal they are lying.”
- Backstory Generation: Creating a deep history for the character to inform why they move a certain way.
- Reference Ideation: Asking Gemini for video reference ideas.
- Prompt Example: “List 5 classic movie scenes where a character is trying to hide their laughter.”
Topic B: Final Polish
- Moving Hold: Adding life (breath, slight sway) to static poses so the character doesn’t die.
- Knee Pops & Jitters: Fixing technical errors in the Graph Editor.
Mentorship & Portfolio Polish
After eight weeks of core instruction, students enter a free 2-month mentorship delivered online via Discord. This phase shifts the focus from learning new tools to applying them to industry standards.
- Project Polish & Portfolio Building: Finish or redo your 2 required projects. High-quality submissions ensure better scores and a stronger portfolio.
- Weekly 1-on-1 Sessions: Each student is assigned a dedicated mentor for a personalised 30 to 60-minute weekly guidance session.
- Open File Reviews: Present open project files via live screen sharing for direct mentor critiques and feedback.
- Live Debugging: Join dedicated livestreams where instructors actively troubleshoot settings and fix your project errors in real-time.
- Final Premiere: Submit your fully rendered images or video for the Virtual Viewing Party to watch and critique final reels with the class.
- Certification & Next Steps: Complete the course evaluation and submit all final polished projects to finalise grading and unlock your Certificate of Completion.
What’s Inside?

1-on-1 Mentorship
One full month of dedicated expert guidance tailored to your specific goals.

Seed LMS Access
Lifetime access to the Student Portal, hosting all your modules and resources.
Weekly Interactive Quizzes
Test your skills and track progress with gamified assignments and feedback.

Official Certification
Validate your expertise with a digital certificate recognized by industry leaders.
What You Will Learn
- Apply the core physics of motion, including timing, spacing, and squash & stretch
- Create fluid, organic movement using arcs, overlap, and follow-through
- Animate believable body mechanics, realistic weight, and balanced walk cycles
- Convey complex thoughts and emotions through silent pantomime acting
- Sync convincing dialogue with accurate jaw mechanics and phonemes
- Craft nuanced facial performances using subtle brow and eye micro-expressions
- Utilize AI tools to analyze subtext and generate deep character backstories