3D Texturing & Shading
Add realism and depth to your 3D creations. Master the art of creating believable surfaces, from rough metal to soft skin, using professional texturing and shading techniques. Learn to utilize PBR workflows to make your models look stunning in any engine
Texture your first 3D asset in our intensive 4-week course
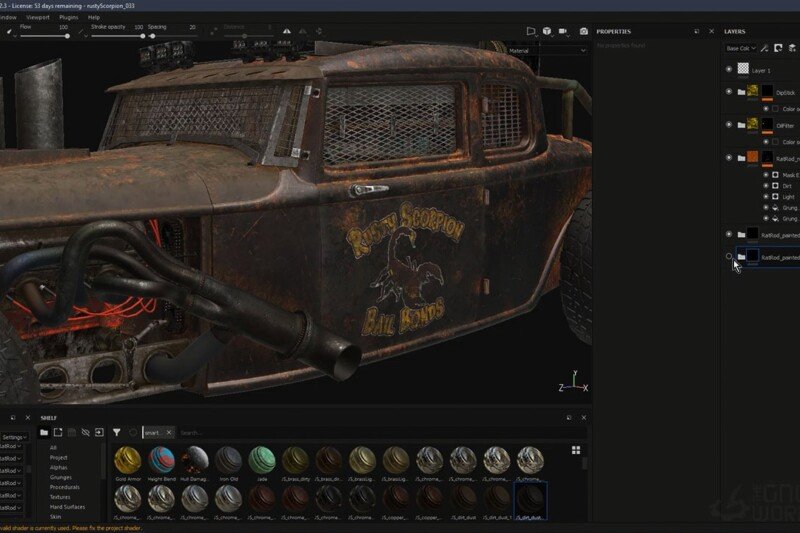
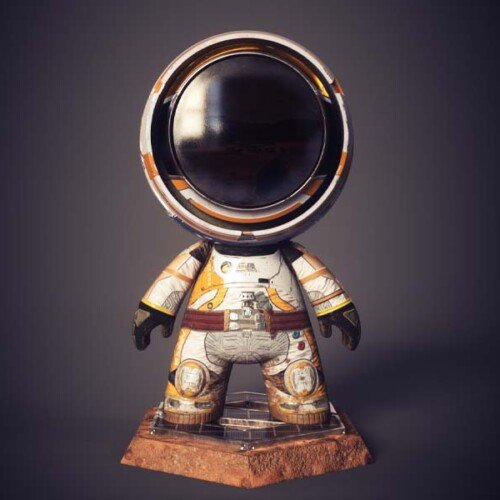
Designed for aspiring texture artists, this comprehensive four-week course on Seed LMS guides you step-by-step through Substance 3D Painter, Autodesk Maya, and modern AI workflows. You will develop the essential skills of baking mesh maps, procedural weathering, painting PBR channels, applying complex shaders, and proper lookdev while establishing a professional digital surfacing pipeline. Beyond the core four weeks, you’ll receive a full month of free, one-on-one mentorship to polish your final textures, troubleshoot your renders in real-time, and confidently build your 3D portfolio. Choose from our curated pool of 10 exciting 3D asset briefs, refine your skills, and graduate with portfolio-ready, photorealistic models.
Course Outline
Week 1: The Foundation – Baking & Basic Layers
Topic A: Setup & Baking
- The 3D Canvas: Navigating the viewport (Maya style) and importing meshes.
- UV Logic: Why bad UVs = bad textures. Checking UVs in the 2D view.
- Mesh Maps (Baking): The secret sauce. Baking Normal, World Space Normal, ID, Ambient Occlusion, and Curvature maps. Why these are essential for generators.
Topic B: Material Basics
- Layers vs. Channels: Understanding Base Colour, Height, Roughness, and Metallic channels.
- Fill Layers: Why professionals use Fill Layers with masks instead of Paint Layers.
- Brush Settings: Alpha shapes, hardness, and stroke jitter.
Topic C: The Paint Workflow
- Projection Tool: Painting stencils and decals onto the model.
- Symmetry Painting: Speeding up work on symmetrical objects.
Week 2: Smart Materials & Generators
Topic A: Masks & Generators
- Black & White Masks: The concept of “White reveals, Black hides.”
- Generators: Using the “Metal Edge Wear” and “Dirt” generators driven by the baked Curvature and AO maps.
- Smart Masks: Drag-and-dropping complex grime patterns.
Topic B: Smart Materials
- The Library: Using and dissecting pre-made Smart Materials.
- Creating Custom Smart Materials: Building a “Rusted Painted Metal” folder structure and saving it for future use.
Topic C: Anchor Points & Height
- Micro-Detail: Adding bolts and panel lines using only Height/Normal information (Fake Geometry).
- Anchor Points: Making generators react to details you just painted (e.g., making rust appear only where you painted a scratch).
Week 3: Opacity, Emissive & Export
Topic A: Complex Shaders
- Opacity: Setting up the shader to paint glass or transparent plastic.
- Emissive: Painting glowing lights (screens, sci-fi energy).
- Sub-Surface Scattering (SSS): Faking skin or wax depth in the viewport.
Topic B: Export Presets
- The Output Template: Configuring exports for Arnold (AiStandard) vs. Unreal Engine vs. Blender.
- Texture Packing: Understanding “OcclusionRoughnessMetallic” (ORM) packed maps to save memory.
- Resolution: Exporting 2K vs 4K maps.
Topic C: Filters & Finish
- Post-Effects: Using Painter’s built-in render mode (Iray) for quick portfolio screenshots.
- MatFX: Adding oil leaks, water drops, and peeling paint filters.
Week 4: The Hookup (Lookdev) & AI Workflow
Topic A: The Shader Hookup (Maya/Arnold)
- Colour Space: The #1 mistake beginners make. Setting “sRGB” for Colour and “Raw” for Roughness/Normal/Metalness.
- The Hypershade: Connecting the exported PNG/Exr files to an
aiStandardSurface. - Displacement: Connecting height maps for real geometry offset.
- Alpha is Luminance: Handling transparency correctly in the Alpha channel.
Topic B: Innovative AI Workflow (Using Gemini)
- Material Science: Asking Gemini for accurate IOR (Index of Refraction) and RGB values for real-world materials.
- Prompt Example: “What is the correct IOR value for Emerald, and what is the Hex colour code for oxidised copper?”
- Decal Generation: Using Gemini to brainstorm text/logos for decals (e.g., “Generate 5 warning label texts for a futuristic nuclear battery”).
- Style Consistency: Describing a visual style to Gemini to get a list of weathering types to apply.
Topic C: Final Render
- Setting up lights in Maya to showcase the roughness and normal maps effectively.
Mentorship & Portfolio Polish
After four weeks of core instruction, students enter a free 1-month mentorship delivered online via Discord. This phase shifts the focus from learning new tools to applying them to industry standards.
- Project Polish & Portfolio Building: Finish or redo your 2 required projects. High-quality submissions ensure better scores and a stronger portfolio.
- Weekly 1-on-1 Sessions: Each student is assigned a dedicated mentor for a personalised 30 to 60-minute weekly guidance session.
- Open File Reviews: Present open project files via live screen sharing for direct mentor critiques and feedback.
- Live Debugging: Join dedicated livestreams where instructors actively troubleshoot settings and fix your project errors in real-time.
- Final Premiere: Submit your fully rendered images or video for the Virtual Viewing Party to watch and critique final reels with the class.
- Certification & Next Steps: Complete the course evaluation and submit all final polished projects to finalise grading and unlock your Certificate of Completion
What’s Inside?

1-on-1 Mentorship
One full month of dedicated expert guidance tailored to your specific goals.

Seed LMS Access
Lifetime access to the Student Portal, hosting all your modules and resources.
Weekly Interactive Quizzes
Test your skills and track progress with gamified assignments and feedback.
Official Certification
Validate your expertise with a digital certificate recognized by industry leaders.
What You Will Learn
- Navigate Substance 3D Painter and bake essential mesh maps for procedural texturing
- Create complex wear and dirt patterns using smart materials, masks, and generators
- Paint realistic micro-details using height and normal information via anchor points
- Apply advanced shader properties like opacity, emissive lights, and glass textures
- Export packed PBR texture maps correctly formatted for Maya, Arnold, or Unreal Engine
- Configure flawless lookdev in Maya with accurate colour space and displacement settings
- Utilise AI tools to determine accurate real-world material values and generate decals

