2D Character Animation
Unlock the magic of frame-by-frame animation. Transform your sketches into captivating stories with our intensive course. Master timing, spacing, and character movement to create polished, professional animations for games, film, and web.
Get started in 2D character animation in just 4 weeks.
This course introduces 2D character animation with After Effects software and the DUIK plugin. Students will learn animation fundamentals, from rigging characters to creating frame-by-frame animation. You will also learn how to incorporate effects, add sound to their animations, and use DUIK for character rigging and animation. This course is designed to help students develop the skills necessary to create 2D animations with After Effects and DUIK. This is NOT a beginner’s course and requires students to have basic knowledge of Adobe Illustrator and After Effects.
Course Outline
Week 1: The Foundation – Art Prep & Hierarchy
Topic A: Preparing Artwork for Rigging
- Layer Separation: How to cut up a character in Illustrator (Head, Torso, Upper Arm, Lower Arm, Hand).
- Naming Conventions: Why “L_Arm_Lower” is better than “Layer 1”.
- Importing: Importing as “Composition – Retain Layer Sizes”.
Topic B: The Anchor Point & Parenting
- Joint Placement: Using the Pan Behind Tool (Y) to place anchor points exactly where joints rotate (Elbows, Knees, Neck).
- Parenting Chains: The logic of hierarchy (Hand is a child of Lower Arm, Lower Arm is a child of Upper Arm).
- FK (Forward Kinematics) Basics: Rotating the shoulder to move the whole arm.
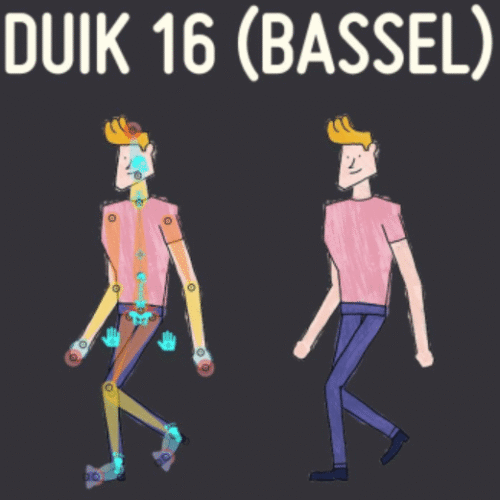
Topic C: Introduction to Duik Ángela
- Installation: Installing the script into the AE ScriptsUI folder.
- Interface Tour: Understanding the “Rigging” vs. “Animation” panels.
- Structures: creating Duik’s built-in “Bones” to visual the skeleton.
Week 2: The Auto-Rig & Inverse Kinematics (IK)
Topic A: Creating Structures (Bones)
- Hominoid Structures: Adding a pre-made human skeleton structure in Duik.
- Aligning Bones: Snapping the Duik bones to your artwork layers.
- Parenting to Bones: Linking the artwork to the skeleton.
Topic B: Auto-Rig & IK
- The Auto-Rig Button: Generating controllers automatically.
- IK vs. FK: Understanding the difference.
- FK (Forward Kinematics): Rotate shoulder -> Rotate Elbow (Good for waving).
- IK (Inverse Kinematics): Move Hand -> Arm follows (Good for push-ups/walking).
- Controllers: Customising the size, colour, and icon of the controllers.
Topic C: Cleaning the Rig
- Zeroing: Ensuring all controllers start at Position 0,0.
- Locking & Hiding: Hiding the bones and artwork layers so the animator only touches the controllers.
Week 3: Advanced Rigging (Face & Body)
Topic A: The Spine & Neck
- Puppet Pins: Using the Puppet Position Pin tool for organic bending (e.g., a rubbery torso).
- Duik Bones on Pins: Converting Puppet Pins into Duik Bones to control them.
Topic B: Foot Roll & Mechanics
- The Foot Roll: Setting up a rig that allows the heel to lift while the toe stays planted.
- Plantigrade vs. Digitigrade: Rigging a human foot vs. a dog leg.
Topic C: Facial Rigging (Connectors)
- The Connector: Creating a slider to control multiple properties.
- Head Turn: Setting up a “Fake 3D” head turn using a slider.
- Blink Rig: Using a slider to open/close eyelids.
Week 4: AI Workflow, Animation & Polish
Topic A: Innovative AI Workflow (Using Gemini)
- Expression Troubleshooting: Pasting broken Duik expressions into Gemini to fix errors.
- Prompt Example: “My After Effects expression is returning ‘Error at line 1’. Here is the code. Fix it so the layer loops.”
- Character Backstory: Using Gemini to generate a personality profile to inform the acting.
- Prompt Example: “Write a 3-sentence backstory for a nervous robot character. How does he walk?”
- Walk Cycle Reference: Using Gemini to describe the key frames of a specific walk type (e.g., “Sneak”).
Topic B: The Walk Cycle
- Contact, Recoil, Passing, High Point: The 4 key poses of a walk.
- Looping: Creating a seamless walk cycle using the Duik “Walk Cycle” procedural tool (and how to adjust it manually).
Topic C: Final Polish & Export
- Anticipation & Follow Through: Adding weight to the movement.
- Exporting: Rendering the animation with an Alpha Channel (ProRes 4444) or H.264.
