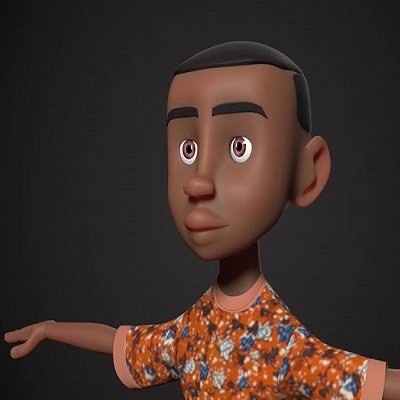
3D Character Modelling

₦160,000
Duration: 4 weeks
Software: Autodesk Maya
Time: 9-12pm
Mentorship: 1 month free
Level: Intermediate
Prerequisite: 3D Animation Jumpstart

Model a 3D character in 4 weeks.
In this intermediate-level course, students will learn how to model a character in 3D. Once this is established, students will be taught how to texture and rig. Next students are taught 3-point lighting set-up and how to render their animation to video. The course is practically oriented, with lots of homework and one-on-one help from the instructor. The last week will be devoted to completing their final projects and producing a 15-second animation reel. The course is intended for intermediate users who have completed the 3D Jumpstart course or have sufficient working knowledge of Maya or a similar 3D app.
Course Outline
Polygon Character Modelling
- Introduction to Modelling with Polygons
- Using Deformers on simple objects – Twist, Lattice, Flare, Bend, Flare
- Project Start – Modelling the low poly character
- Setting up photo references and Image planes
- Modelling Techniques (box method vs edge loop method)
- Clean Topology using quads, a few triangles, and n-gons
- Introduction to Maya’s polygonal modelling tools – Extrude, bridge, Merge, Multi-Cut, Insert Edge loop, Combine, Smooth, Sculpt geometry tool, etc
- Modelling with symmetry – Mirror Geometry, Merge vertices, Edge Loops
- Development of form and detail (low poly count, surface quality, hard and soft edges)
- Homework – Students will create a low-poly character, and the Instructor will review
UV Unwrapping
- Purpose and applications
- Types of UV Mapping (planar, cylindrical, spherical etc)
- Unwrapping UV and proper UV mapping on models
- Unfolding and stitching UVs of objects
- UV Snapshot for exporting UV to image files
- Homework – Student will create UVs for their character
Shading and Texturing
- Introductions to Shading: Materials and Textures
- Applying Basic Textures
- Working with Maya’s Hypershade
- Homework – Student will use simple materials for their character
Introduction To Character Rigging
- Create basic facial expressions using blend shapes
- Creating and fitting a basic advanced skeleton rig to the character
- Building the complete advanced skeleton rig
- Skinning the polygon character to the rig
- Use basic skin cage to adjust Skin weights
- Basic weight painting
- Posing a character after rigging
- Homework – Student will have completed the rig of their character and create simple poses
Lighting & Cameras
- Introduction to Lights and Cameras
- Types of lights (skydome, point, spot, ambient and area lights)
- Three (3) point light setup (Key/Fill/Rim)
- Arnold Sun and Sky Light
- Setup of Lights and Cameras
- Creating a turntable camera
- Playblast your scene
Rendering & Exporting
- Introduction to Rendering
- Introduction to Arnold Renderer
- Arnold Render View
- Rendering Settings, Batch Rendering, and Formats
- Rendering out still images and video
- Final Project: Creating a Short Animated Scene
Project, Mentorship and Assessment
- Instructors will review and grade the finished piece for their portfolio
- Final viewing party: Kick back, relax, and watch student reel

